 联系电话:023-68661681
如果您在ASP.Net Core应用程序中使用FastReport.Net并希望切换到单页应用程序(SPA),那么本文适合您。 由于Angular和ASP.Net Core的共生,您可以使用您熟悉的MVC应用程序架构。
我们来看看创建SPA应用程序的方法。这对那些刚刚学习Angular的人很有用。要使用Angular,您需要安装Node.js,这是一个在服务器端执行JavaScript代码的平台。 最简单的方法是从开发人员的网站https://nodejs.org/en/下载安装程序。 它还需要.Net Core SDK 2.0或更新版本。 如果安装了Microsoft Visual Studio 2017,则已安装SDK。
现在我们在所需的位置为我们未来的应用程序创建一个文件夹。运行命令提示符。使用cd命令转到创建的目录。我们执行命令:
dotnet new angular -o SPAWebReport
此命令将创建一个三页的演示应用程序。
打开创建的项目。首先,我们需要在NuGet管理器中安装其他软件包:
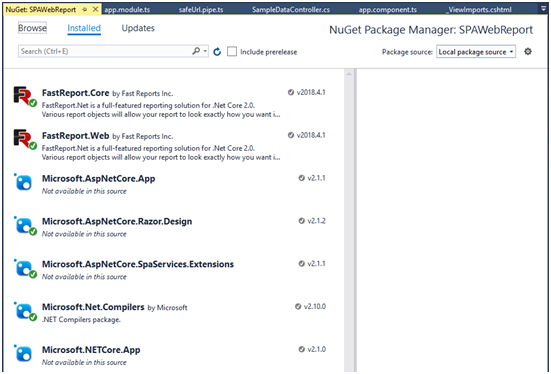
FastReport.Core和FastReport.Web包可以在FastReport.Net安装目录的NuGet文件夹中找到。要安装这些软件包,您需要设置本地软件包存储库。在包管理器的右上角有一个下拉列表,用于选择包的来源和齿轮图标。 通过单击此图标,您将看到设置窗口,在本地源中,您将指定NuGet文件夹的路径。
我们需要一份报表和一个数据库。 将App_Data文件夹添加到项目根目录,并将Master-Detail.frx和nwind.xml文件拖入其中。 这些文件可以在Demos - > Reports文件夹中的FastReport.Net安装目录中找到。
项目的根目录是Controllers目录,该目录已包含一个控制器。我们使用它。 只添加一个方法:
using FastReport.Web;
…
[HttpGet("[action]")]
        public IActionResult ShowReport()
        {
            WebReport WebReport = new WebReport();
            WebReport.Width = "1000";
            WebReport.Height = "1000";
            WebReport.Report.Load("App_Data/Master-Detail.frx"); // Load the report into the WebReport object
            System.Data.DataSet dataSet = new System.Data.DataSet(); // Create a data source
            dataSet.ReadXml("App_Data/nwind.xml");  // Open the xml database            WebReport.Report.RegisterData(dataSet, "NorthWind"); // Registering the data source in the report
            ViewBag.WebReport = WebReport; // pass the report to View
            return View();
        }
现在您需要为它创建一个视图。 将Views文件夹添加到项目根目录。 还有一个SampleData。 现在,在此文件夹中,我们将使用以下代码创建ShowReport.cshtml视图:
@await ViewBag.WebReport.Render()
在我们的演示SPA中,有三个不必要的网页。 您可以安全地删除这些页面; 我们只对app.component.htm感兴趣 - 这是页面模板。 对于此模板,有一个相应的脚本app.component.ts。
您可以在app.component.htm文件中设置页面模板,也可以直接在脚本中的组件模板参数中进行设置。
我们的任务是“cross”角度和ASP .Net Core。 这意味着我们将使用控制器和视图进行操作。 相当标准的ASP .Net Core MVC应用程序。 最简单的解决方案是在iframe中传递视图:
App.component.ts:
import { Component } from '@angular/core';

@Component({
    selector: 'app-root',
    template: `<div>
                    <iframe  id="report" height="1000" width="1000" src= "api/SampleData/ShowReport"></iframe>
               </div>`
})
export class AppComponent {
}
这样一个简单的代码允许您在加载SPA应用程序时立即显示报表。 如果您为报表选择了单独的页面,但是如果需要更多交互性,这是合适的吗? 例如,单击时加载报表的按钮。 让我们为页面模板添加一个按钮,以及一个按钮单击事件及其处理程序:
@Component({
    selector: 'app-root',
    template: `<div>
                    <input type="button" (click)="Clicked()" value = "Show Report"/>
                   <div *ngIf="show">
                    <iframe id="report" height="1000" width="1000" src= "api/SampleData/ShowReport"></iframe>
                    </div>
               </div>`
})
export class AppComponent {
    show: boolean = false;

    Clicked() {
        this.show = true;
    }
}
我们在其属性中添加了一个按钮和一个单击的事件。 但是如何在按下按钮之前隐藏框架? 为此,我们将框架包装在具有条件的div中 - 检查'show'变量是否为'true'。 默认情况下,此变量设置为false,因此在显示页面时不会显示此div。 因此,Clicked函数只是将show变量的值设置为true。
将帧的src值放入变量并将其设置在单击的函数中会很好。 但是,如果你这样做:
…
<iframe id="report" height="1000" width="1000" [src]="url | safeUrl"></iframe>
…
url: string;

    Clicked() {
        this.show = true;
        this.url = "api/SampleData/ShowReport";
    }
那样不行。 事实是链接需要使用特殊的“cleaner”DOMSanitizer进行规范化。 它旨在使html代码和URL免受恶意包含。
让我们在app文件夹中创建safeUrl.pipe.ts脚本:
import { Pipe, PipeTransform } from '@angular/core';
import { DomSanitizer } from '@angular/platform-browser';

@Pipe({ name: 'safeUrl' })
export class SafeUrlPipe implements PipeTransform {
    constructor(private sanitizer: DomSanitizer) { }
    transform(url) {
        return this.sanitizer.bypassSecurityTrustResourceUrl(url);
    }
}
该类将以正确的格式检查url的安全性。 为了在app.component中使用此Pipe,我们需要将它添加到app.module.ts中的模块:
import { SafeUrlPipe } from "./safeUrl.pipe";

@NgModule({
  declarations: [
    AppComponent,
      SafeUrlPipe
  ],
  imports: [
    BrowserModule.withServerTransition({ appId: 'ng-cli-universal' }),
      FormsModule
  ],
  providers: [],
  bootstrap: [AppComponent]
})
export class AppModule { }
Let's go back to app.component.ts. Now we can use Pipe:
 import { Component } from '@angular/core';

@Component({
    selector: 'app-root',
    template: `<div>
                    <input type="button" (click)="Clicked()" value = "Show Report"/>
                   <div *ngIf="show">
                    <iframe id="report" height="1000" width="1000" [src]="url | safeUrl"></iframe>
                    </div>
               </div>`
})
export class AppComponent {
    show: boolean = false;
    url: string;

    Clicked() {
        this.show = true;
        this.url = "api/SampleData/ShowReport";
    }
}
进一步开发该想法,您可以将报表的参数名称添加到ShowReport方法,并在输出中获取所需的报表。
在启动应用程序之前有最后的触摸。 打开Startup.cs文件并在Configure()方法中添加一行:
public void Configure(IApplicationBuilder app, IHostingEnvironment env)
        {
…
            app.UseFastReport();
…
        }
因此,我们连接到应用程序FastReportBuilderExtensions,它将允许渲染报表。
现在让我们运行我们的演示应用程序:
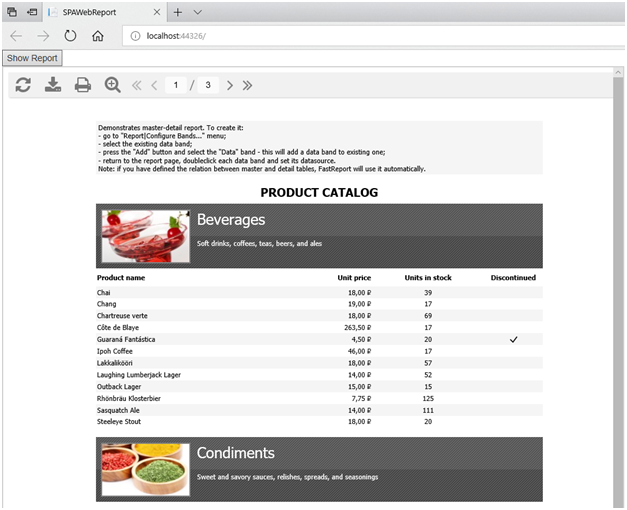
按下按钮,我们得到了所需的报表。 正如您所看到的,使用带有Angular SPA的FastReport并不困难。
购买FastReport.Net正版授权,请点击“咨询在线客服”哟!
欢迎任何形式的转载,但请务必注明出处,尊重他人劳动成果
转载请注明:文章转载自:FastReport控件中文网 [https://www.fastreportcn.com/]
本文地址:https://www.fastreportcn.com/post/2298.html
 返回
返回